31 December 2012

BE- One little word for 2013

All of the photo graphics in this post were edited by me. Feel free to pin and reuse! 

Last year I decided to choose one little word for the year. I chose "Glorious".
Now I won't lie, it didn't dramatically shape my year but it was a small voice in the background. It made me re-access certain situations, especially regarding blogging. I liked having a focus for the year, I liked channelling, certainly my creativity and blogging, around it.

Choosing a word this year was hard. There were a lot of words I played around with including, abide, wait and still. Still nearly won out I tell you! But I wanted something simple and paired back so I settled  on "BE".


Be is important for me this year.
For the first time I am settled. I am not finishing school, I am not on a gap year. I am at university for three years. This is stability friends! I therefore wanted a reminder to myself that just being is good. It is ok to settle and be still.


I have also noticed a tendency in myself to rush ahead. I am a planner, I like to look to the next thing. But you know what? I am missing a load of enjoyment out of the now.
Practically it is about changing my attitude for when I am with the boy. Instead of thinking how long we have left till one of us has to go back to uni, it is enjoying that I am with him here and now.
I want to be present.


There were a lot of other factors surrounding the word "be". Some personal, some very trivial. But I hope mostly that this word will just make me "stop" sometimes.

Last year "glorious" really developed into a whole new blog design. I am excited for what "be" can bring this year!

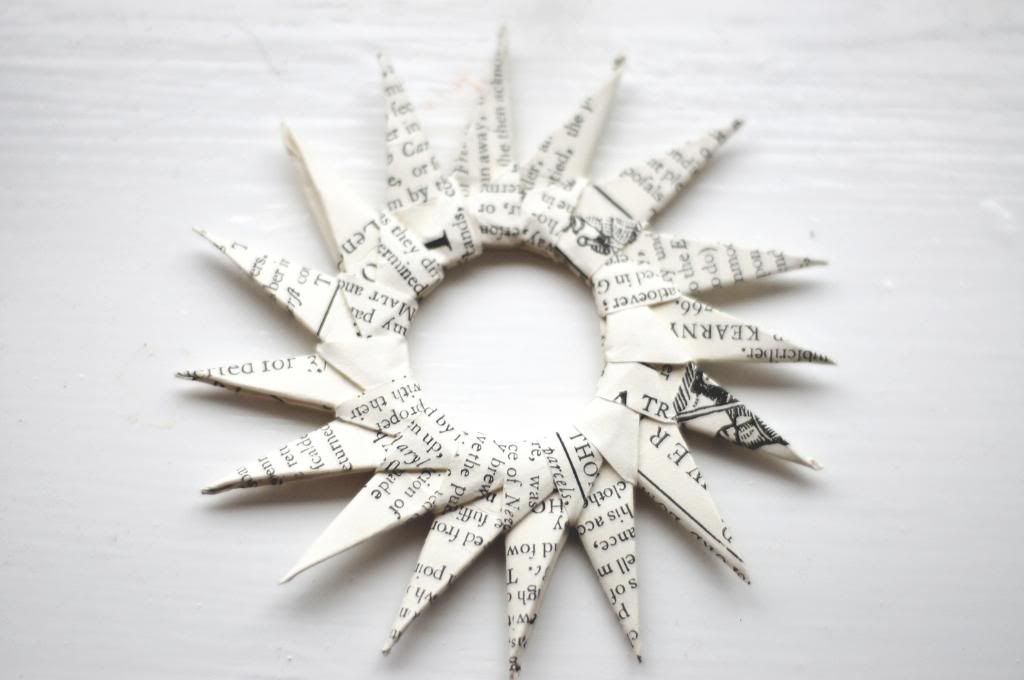
Last year I really valued brainstorming my one little word at the start of January. This last week I have sat down and stamped out some sentiments for this coming year and then created a graphic on photoshop. Hopefully this will translate into some form of paper project!


Do you have a little word for 2013?

Do drop by tomorrow for a free download of some more hand-stamped graphics....


29 December 2012

Favourite photos/moments of 2012

Part two of my favourite photos and moments of the last year and we jump straight in at July.

I loved organising a mini photography course on the blog. This is one of my favourite photos from the lesson on aperture.


We moved house over the summer and I found a new spot to take photos.


We jetted off for a week in the sun in Virginia. I took so many photos during those seven days but these two are probably my favourites. 


September was such a weird month. Everyone had gone back to work or school and I was left waiting for uni. 


My quilt in three days is probably my favourite project from 2012. It was great to make something to take away with me, and provided me with something to focus on. 


Definitely the most significant moment of the past year; heading off to Durham. 


I feel so blessed to have settled in quickly at uni and be surrounded by buildings like this. 


I have made some wonderful friends at Durham. We have enjoyed plenty of walks together along the river, and towards the end of term in the snow! 


I went on our CU weekend away to Scotland in November. It was one of the coldest weekends but so good to spend some time away. 


The term ended, I headed home for Christmas and here we are again, reflecting on another year! 


What were the highs and favourite moments for you in this past year? 
Bring on 2013! 

28 December 2012

Favourite photos/moments of 2012

Oh yes, it is that time again! The time of year when I look through all my photos and reminisce over the best moments and my favourite images!

It is also a time when I reflect that I really should back up my photos more often, and that changing computers and operating systems halfway through the year makes this post particularly tricky! 

So we start off with Christmas 2011 and the boxing day hunt, which incidentally was far drier than this years was!


I love this photo I took at the steam railway near my Grandma's house back in February.


It was strange to visit the boy at uni. I was still on my gap year and it was the first time we were living in totally different places doing very different things.


Whilst searching through the folders I found this gem taken in around March. Brilliant!


Spending quality time with the boy when we were both on holiday. This is one of my favourites of us.

April 2012. The boy, me and two friends headed to the beach. The pictures from that day are wonderful.


2012 will always be dominated by my gap year. I adored working with Children, gaining some teaching practice and capturing the funny things they said to me. It was an exhausting year but very rewarding. I can't document photos of the children here but I do like this photo of me in my easter hat ready for the borders feast!


Beautiful sunsets as spring turned into summer.


I tried to capture the memories of working in a school as my final term came around.


Photos on a family walk.


It always amazes me to go back through all the photo files of the year and discover again those moments that made it special. Such a fun exercise! Do stop by tomorrow for the second part of 2012 photos!

Thanks for stopping by.

27 December 2012

Merry and Bright


We had a truly lovely Christmas. The fire was lit, the food was plentiful and the presents were good! We enjoyed a whole family scalextrics championship before lunch then spent the afternoon playing our favourite board games. The best!


And my christmas present? Photoshop elements. I am a happy girl!
Hoping your Christmas was Merry and Bright!


Do stop by in the next few days. I'm going to take you all on my annual romp through the best photos of 2012 and announce my one little word for 2013!

Thanks for stopping by.

24 December 2012


"Heaven sings Alleluia. Alleluia the earth replies."
May you have a joyful and peaceful Christmas. 

23 December 2012

5 tips for Christmas photos


Before Christmas kicks off in earnest I thought I would share five tips for getting those all important photos.

1. Aperture
I talked about aperture a lot on my photography course. In a nutshell aperture is how far open your lens is. The smaller the number the wider it is. Aperture creates that beautiful blurred background effect. For Christmas this is perfect.

Turn that dial to Manual ( I know it is scary) or Aperture select and crank that F stop number down as low as it can go. I use f.1.8. Then experiment with getting close to the baubles and letting the background blur out.


You can also set your lens to manual focus, turn it towards your lit tree and click when the tree looks out of focus. You get lovely bokeh like this.


2. ISO
This is basically how sensitive your camera is to light. At Christmas, rooms are often dark or the lighting is low. If you want to take photos without flash, the best way to make sure they are light is to push your ISO up. The higher the number the lighter the picture is.


For these I used ISO800.
They can go a bit grainy but I think this adds to the effect!

3. Use the light
Take advantage of that morning light. If you want to photograph something in detail put it on the windowsill and snap it when the light is good. At Christmas those hours of good daylight are short so plan accordingly.


4. Capture the details before everyone arrives
I can't stress this enough. When guests are around it is so hard to go off and take photos. Instead, grab your camera and 10 minutes to yourself in the lull before everyone arrives, and photograph the details. Use points number 1, 2 and 3 to make it easier and snap away!

I think the details are just as important as the event itself so take the time to capture them however do it when there is a modicum of peace and quiet (if that is possible!)

5. Turn on auto.
When the festivities begin the last thing you want to do is be fiddling with your shutter speed to capture the perfect picture. Life is too short friends! On Christmas day I just turn my camera to auto, flash and all, and snap away! The moment is far more important to me than a nicely exposed photo. And there is always the joy of editing afterwards!

Happy Christmas photographing!

21 December 2012

DIY Paper Starburst

Each year I make a decoration for the Christmas day table. Something little to go on everyones plate.

This year I knew I wanted to go with the star theme and love a bit of origami. I finally found this pattern on a number of sites. I sort of combined a lot of tutorials because several were in different languages. I also made the starbursts a lot smaller out of thicker paper. So here is my own take on the paper starburst.


Tutorials I referred to here and here

Supplies: 

Thick paper. Not card as it could be hard to fold but not thin paper either.
Embellishments to decorate
Patience
A cup of tea (goes without saying)

Instructions:
1. For each starburst you will need 16 2' x 2' squares. It's just easier to cut these out first.


2. Take your first square and fold the corners into the centre like this.


3. Now turn the square so it is like a diamond and fold two of the edges in like this so it looks like a kite.

4. Turn the kite shape over and fold that top triangle over.


5. Now fold the shape in half so that folded edges are on the inside and that triangle you just made is on the outside.


6. You have completed the first point of the starburst! Make another just the same. To join them take one of your points and look at the folded edge. You should see two little openings. You need to push the pointed ends of the second point into these openings like this.


7. Because you have used thick paper the points should slot in tightly and hold their shape. I didn't use glue at all but if you want them more robust I would add a dab of glue to secure each point into the next one.

8. Keep making the points of the star and slotting them into the next one. I slotted eight together like this, left it, and then created another eight and joined the two halves together.


9. Joining together is the hardest part as it can be a bit wobbly but once all sixteen are in place it will hold together pretty well.


10. I decorated each starburst with the initial of the guest and some stars.


A few tips:

If you are having difficulty slotting the points into the flaps, open the flaps a bit more with a bit of wire.
Once you get the hang of it these are so easy. I suggest a large mug of tea, an audiobook and some slippers.


Enjoy!